Uploading (Publishing) Documents
Publishing Mixed Text and Picture Documents as Web Pages
Web folders with more than one .htm file
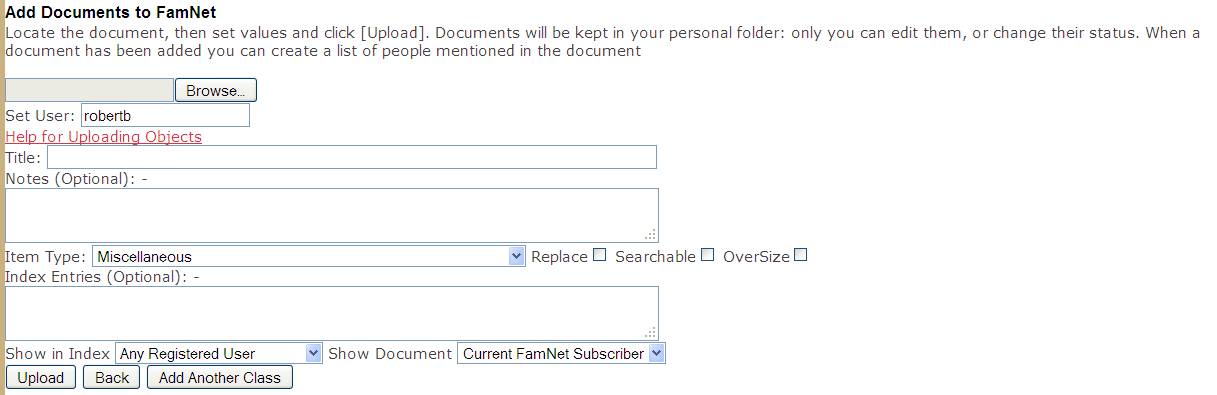
At several places in FamNet – Scrapbook editing, General Documents, Uploading a Family Tree, etc you have the opportunity to upload an object from your computer. Although this appears to be simple, you may have to make choices about the document class, and the format that you will use.
Choosing an Item Type
In some situations such as Uploading a Family Tree, and Uploading a Picture in the basic-editing page the item type is predetermined. In other situations however, such as uploading a general document or a scrapbook item you must choose it: for example, here a scrapbook item is being uploaded. When we expand the Item Type drop-down list there is a list of the valid types for this situation. Once we have chosen the item type the system will check that the item that we upload is suitable. For example, if we select “Picture” then the item must have format .jpg, .png, or .bmp., but it cannot be a word document (formats .doc, .docx), and so on. On the other hand, if we had selected “Miscellaneous” then .doc, .docx, and .rtf would have been permitted.
Choosing a Format
When you are uploading (publishing) a scrapbook item or general document you may have little choice about the file format.
- Pictures are usually .jpg or .png and so you just upload them in the format that you have them on your computer.
- Audio will be .wav or .mp3
- Video will be .avi or .mp4
And so on. Even if you do understand the differences between the various formats, you may not have software that you would need to change them. However many item types can accept documents in several different formats, and so you may have a choice. A Family History (which is the story of a family) and a Biography (the story of a person) can be uploaded as a Word Document (.doc, .docx, .rtf), a PDF document (.pdf), a text-only HTML page (.htm), or a full web page with graphics (.zip). If you have a choice then: -
General rule #1: “Smaller is better”. A video in .avi format can be 10 times the size of same video as .mp4: with .avi format you can only store a very brief video and remain under the 8MB size restriction, and the video will take a long time to load and play. Compare this 612KB .mp4 video of my granddaughter, with exactly the same video as a 5,845KB.avi
General rule #2: Formats that are displayed directly by the client’s browser without requiring a plug-in or particular client software are preferable to formats that require a plug-in. For example, compare the examples of .doc and .pdf with the examples of .txt and .htm. The results, and whether you require a plug-in, may differ depending on your browser and operating system.
Text Documents
Item types like Family Documents, Miscellaneous, Biography, and Narrative Family History may be text only, a mixture of text and pictures, or one or more pictures only.
In most situations FamNet will display a document within the document display page, which will display the document within a frame below the document’s title and notes. The examples below display documents in this format. In some cases – this depends on the combination of the file type, your browser and its options, and your operating system – the document will cause a separate browser window to open even though this is not requested by FamNet.
If the document is just text then you may store it as type .txt, .doc, .docx, .rtf, .pdf, or .htm. Htm is usually my preference as it is efficient and works well with all browsers, but all types have their advantages and disadvantages: -
|
Format |
How to produce it |
Advantages |
Disadvantages |
Example |
|
.txt |
Basic editors like Notepad, or Word using option “Save as Plain Text |
· Smallest possible document size: there is no extra “overhead” with formatting etc. · Can be read quickly by any browser, without requiring a plug-in. |
· You can’t control font types, size, etc. The document looks horrible. |
|
|
.doc |
Microsoft Word and other full-function word processors. |
· Default format: easiest output format from Word · Font formats fully controllable |
· Requires a plug-in for most browsers other than IE |
|
|
.docx |
Microsoft Word from Word 2007 |
· As for .doc |
· As for .doc · Some users may still be on older versions of Word and not be able to read this format |
|
|
.rtf |
Microsoft Word etc, using Save As Rich Text Format |
· As for .doc. |
· As for .doc · May be smaller than .doc (but check this – not always) · More likely than .doc and .docx that the client will be able to read the document without a plug-in: .rtf is readable by most word processors. |
|
|
|
Your word processor may provide this as a Save As option, or you might use special PDF software. |
· Looks the same in any environment |
· Requires a plug-in. · May open in a separate browser tab |
|
|
.htm |
Microsoft Word with “Save As Web Page” or “Save as Web Page (Filtered)” |
· Fast rendering · No plug-in · Flexible resizing (e.g. drag margins of browser while viewing the example) |
· Graphics will be lost (see below) · Layout, fonts, page flow differ to .doc format. |
|
|
.zip |
Compressed file. The .zip file will be expanded on the server |
· Reduced upload times · Allows you to upload complete web pages, with graphics · Can be a way of uploading files (particularly GEDCOMs) which exceed FamNet’s limits |
· Uploading in this format takes more work |
|
Publishing Mixed Text and Picture Documents as Web Pages
If your document contains a mixture of text and pictures like this one then you can’t use .txt, but you can use .doc, .docx, .rtf, or .pdf as you did before. However publishing as .htm becomes more difficult which is a shame as the web page format continues to be the best for users. As before you can create your document with Microsoft Word, save it using “Save as Web Page”, and then upload the .htm document to FamNet, but now when you display the document you’ll just see a space at the left where the picture should be.
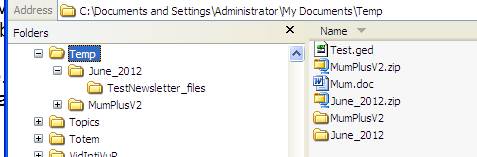
Why is this? I created this example by editing the Word document and then “Save As Web Page(filtered)”. I was working in a folder “Family Docs”: if we look at the files in this folder we see that I saved a document “Mum.htm” and this is what I uploaded. But there is also a folder, “Mum_files”, and when we open this we see that it contains the image as “Image001.jpg. This was not uploaded, so that when we try to display Mum.htm from the server there is a reference to Mum_Files/Image0001.jpg, but the system can’t find it. Even if the server knew the full path to this file on my computer it wouldn’t be able to access it: we have to have a copy of the folder “Mum_files” on the computer. It is not enough to upload the file Image001.jpg as well as Mum.htm: the reference needs the folder name also. After all, there might be other documents that have their own “Image001.jpg”.
However we cannot upload a folder. Try it: try to select a folder in the upload dialog. You’ll see that when you select a folder the Explorer window remains open but now displays the contents of the folder. It will only select an actual file, such as a .txt, .doc, etc.
The solution is to store the full set of files as a Zip file, then upload this with type .zip. When FamNet uploads a .zip file it will check it for validity and, if OK, reconstruct the original structure of files and folders. The full process of creating a web document using Microsoft Word is illustrated below using as example a FamNet newsletter. These documents have three different kinds of links and sometimes complex editing so this illustrates most of the situations that you are likely to encounter in your own documents. You may have a specialist HTML editor such as Frontpage, Blend, Dreamweaver, etc: if so the details will differ but the general principles will remain the same.
Microsoft Word provides an option “Save as Single File Web Page” which would be ideal. Unfortunately this format is only supported by Internet Explorer, and other browsers won’t handle the .mht files, so FamNet hasn’t provided this as a valid file type.
Step 1. Create a Subfolder
Although you might omit this step for something as simple as Mum.htm, you will easily get confused if you have several htm documents with pictures and links, or if you are dealing with a complex document, so working in a special folder is a good habit even if not always necessary. Newsletters should be in a unique folder with a name like “June_2012”, i.e. a month and year separated by “_” (no blanks).
Step 2. Write the document
Start writing your document. From the beginning use “Save as Web Page(filtered)”. Microsoft Word behaves slightly differently when editing a web page: most obviously, the document is not divided into pages, and text flows across the window and will flow from line to line as we drag the window margin in or out. There are other differences too, but by working in the Web format we are less likely to encounter problems than if we work in .doc format and leave conversion to .htm until the end. If you started with a document in the default .doc or .docx format you should delete it, or at least ensure that it is tucked away somewhere where you will know that it is not the current version of the document. With several copies it is very easy to get confused and edit the wrong version (I speak from experience). You can always “Save as Word Document” if you want to go back to the default .doc format for a printed document.
Here’s an example: I have saved “TestNewsletter” as .htm within a folder that I created within My Documents\Temp.

Embedded Graphics
In a newsletter like this there are several pictures, with the text flowing around or alongside the pictures. We can put these pictures into our documents by Copy/paste, or by using one of the options from Word’s Insert/Picture menu. Once we have the picture more or less where we want it in the document we can edit it by dragging it around, by using “Format Picture” to control the way text flows around it, and we can resize it by dragging one of the sizing handles. If you want only part of the picture, or you want it to be much smaller than its default size, you should consider editing the picture rather than just cropping or sizing it: otherwise you may be transmitting a very large picture when a much smaller version such as a thumbnail would have done and would have made your page render much more quickly.
All of the pictures inserted by Copy/Paste will be found in the _Files folder, where you’ll see a series of object “Image001.gif”, “Image002.jpg” and so on. Images inserted by Insert/Picture may be in this file, or may remain as external references.
External Links – To Other Web Pages
Creating a link that, when clicked, opens another web page is easy. Just click the hyperlink icon and paste in the URL. For example, where I wrote “I’ve added a “Getting Started” document” the hyperlink address is //www.famnet.org.nz/Help/Famnet-In_Schools_Getting_Started.htm Note that it includes the full URL, starting with http:// and the domain name.
External Links – To Next-level Objects
In your page you may want to have links that open 2nd-level objects. For example, towards the bottom of the newsletter this appears: -
Today we take it for granted if we need furniture polish or shaving cream we just pop down to the supermarket. Read how our ancestors managed without supermarkets and just how resourceful they were. Making their own cure for borer, making cream for chapped hands for men and the housewife, curing 160lb. pigs, and more.
Internal Links
Step 3. Test the Web Page
Step 4. Create a Zip File
Step 5. Upload the Zip File
· As with uploading a normal object, set “replace” if you have already uploaded the object and wish to upload a fresh copy.
· For Newsletters the folder name will be checked to ensure that it has the correct form.
Web folders with more than one .htm file

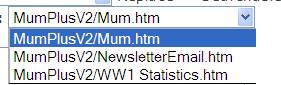
In this case the base document is Mum.htm, which includes a picture (which is in mum_files) and links in the text to the other two htm documents. Having developed these web pages locally I then zipped the folder and uploaded it, and FamNet unzipped it on the server. There is now a problem: if you click the link that you’re creating, which .htm page should open? We cannot assume that it will be the first. If there is more than one .htm file then a dialog will ask you which is to be linked to the database as the FamNet document or scrapbook link. For example: -
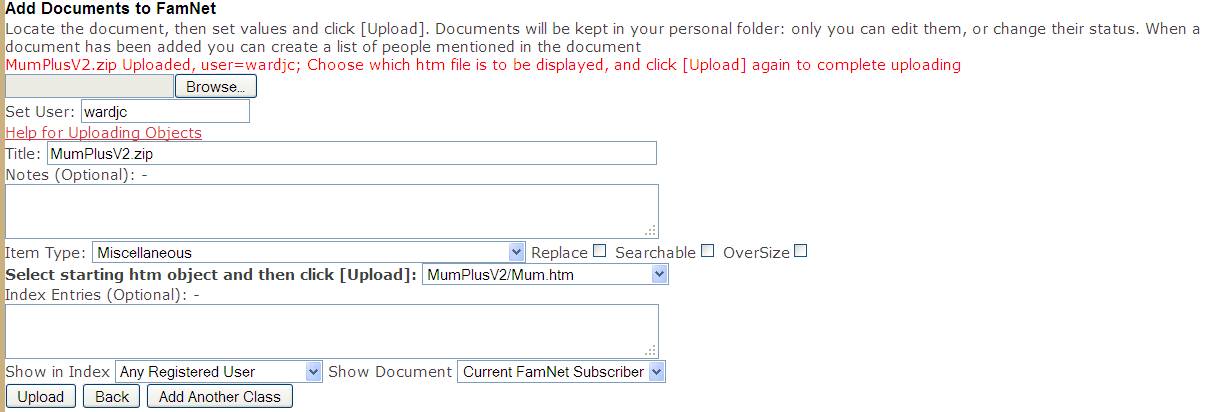
The drop down list will include all three .htm objects: -
General Documents
Index Entries
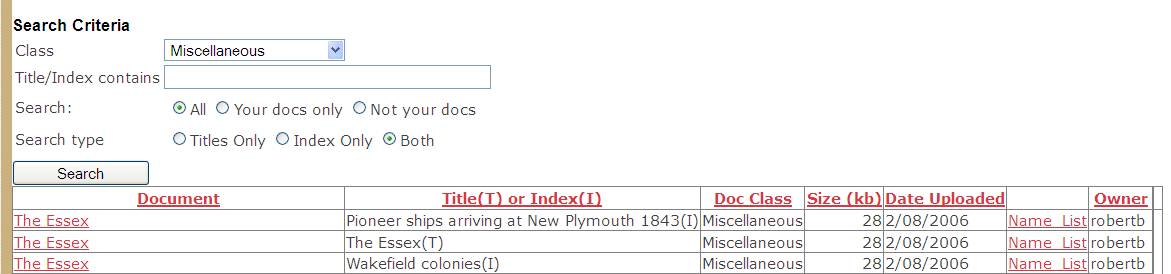
Here you can put words and phrases that somebody might look up. For example, a document with title
“The Essex” was given index entries like this: -

Access Control
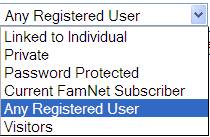
Private means that only the owner can see it,
Current FamNet Subscriber. Only visible to users who have a current subscription
Any Registered User: user must be registered in FamNet, but may not have paid a subscription
Visitors: visible even without logging into FamNet