Getting Started – Talking to your Family
Getting Started –
your first record
Adding Brothers and
Sisters (Siblings)
Linking these
records to your own.
Introduction
Obviously you can’t talk to your dead ancestors
and you have to look things up in libraries and on web sites, whereas you can
talk (and write and email) to your living ancestors, so before you rush off to
web sites and libraries the first thing to do is to get as much information as
you can from your parents and grandparents, and other members of your family.
While these notes were written to support “FamNet in Schools” and so expect the reader to be a child, older readers who are just starting with FamNet will also find them useful as an introduction to building a family tree on line. Differences will be: they probably can’t talk to their grandparents, they may not even be able to talk to their parents, but they can fill in information about their partners, children, and perhaps grandchildren.
Getting Started – your first record
Start with yourself: create a record in FamNet about you.
Log on to FamNet, and click “Edit”. Since you haven’t yet created any records, this will display an empty page like this. What is your full name? When, and where, were you born? You might like to write something in “Notes” about yourself. If you have a suitable picture that you can upload, locate it on your computer with [Browse], give it a title, and click [Upload]
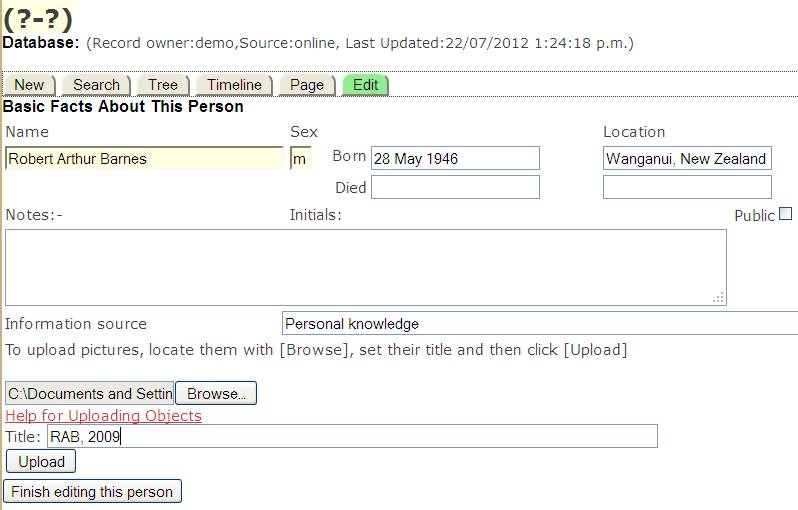
When you
are through, click [Finish Editing This Person]. The system responds by
displaying the start of your family tree. At this stage there is only you: -
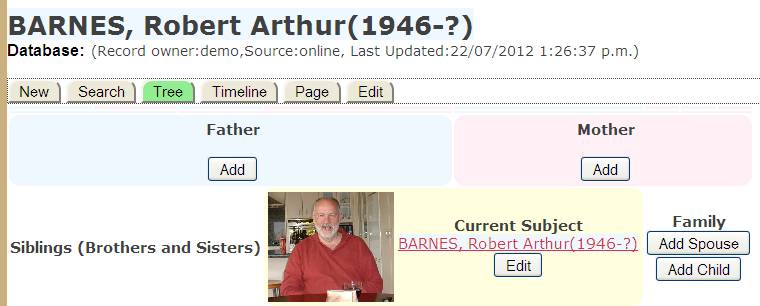
If you are under 16 then the buttons to add spouse or children don’t appear.
Add your parents
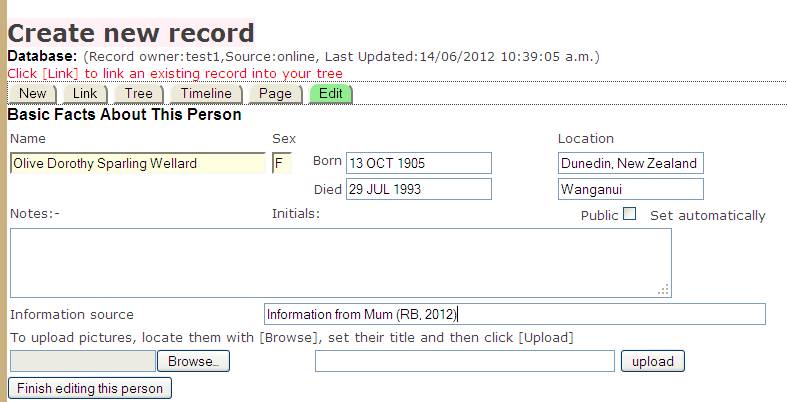
Next, add one of your parents, for example your mother, then repeat for the other parent. Click the relevant Add button, and you get another Edit page. Here I’m adding the detail of my mother. Note that in a family history database we add females with their birth name: my mother was born “Olive WELLARD”, even though she was Olive BARNES when I was born. My mother has died but yours will still be alive, so unlike me you won’t put anything into the Died section. Get into good habits by using “Source” to record where you got your information from – in your case probably “Talking to Mum, 2012”.
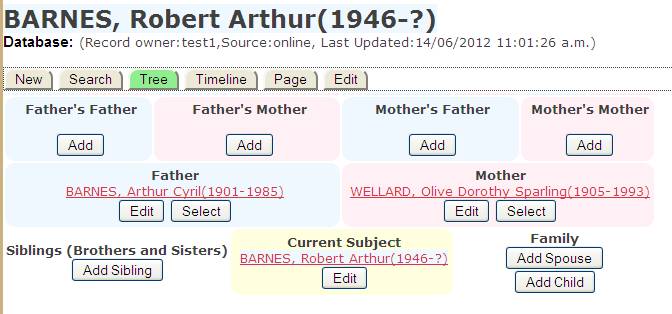
When you’ve added your parents your tree will look like this (without year of death of course): -
Adding Marriage Details
In a family history database, key information about people is where and when they were born, where and when they died, and where and when they were married, as these are the important events that get recorded in registries and databases. Notes above show you how to record birth and death, but how do I record details of my parent’s marriage?
Click [Edit] for one of the parents. It doesn’t matter which one. Here I’ve clicked my father’s [Edit] button: -
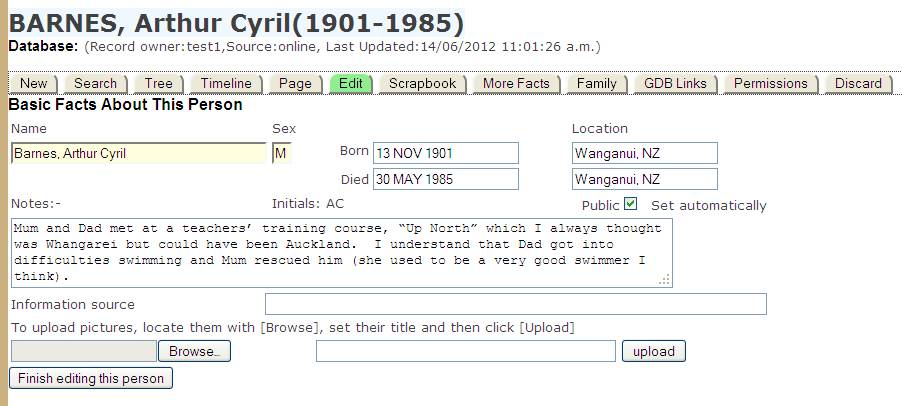
Now click the [Family] tab, and fill in the date and place of their marriage: -

Adding Wedding Photos
You can upload wedding photos – but do you want these attached to your father or mother? You want them attached to both. Here’s how.
With one of your parents, click [Edit] and then [Scrapbook]. You can then upload a wedding photo: -
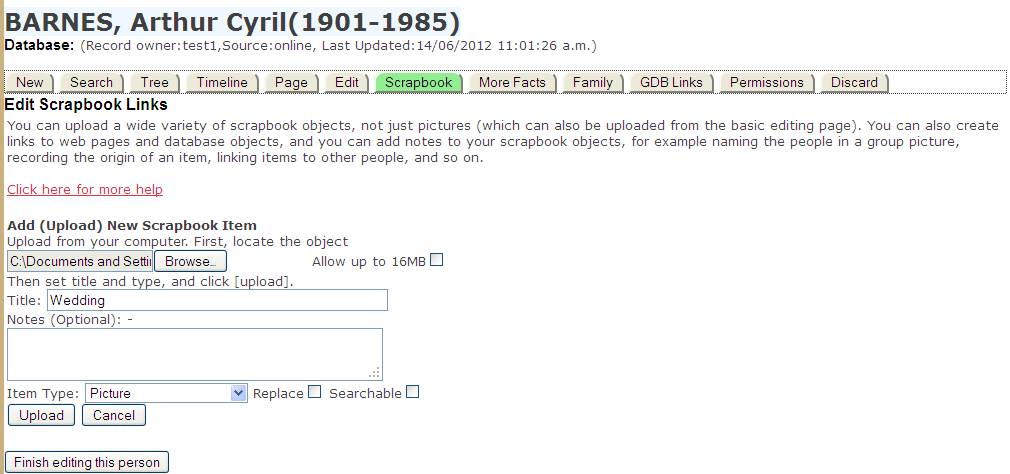
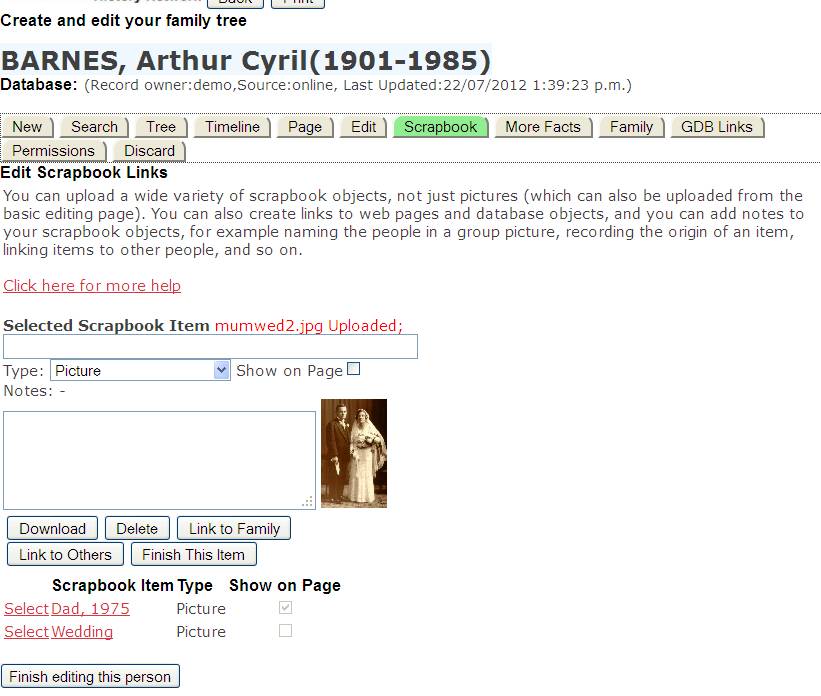
When you click [Upload] the system uploads the picture into the scrapbook for this record, and selects it for display with options to edit it further: -
Click [Link to Family] to see a list of people in the database who are family members of the subject (Arthur Cyril BARNES in this case). This includes parents, siblings, partners, and children, the people most likely to be in a picture of this person. In this example where we are just starting to build the tree the only people in this list are the wife and child of A C Barnes.
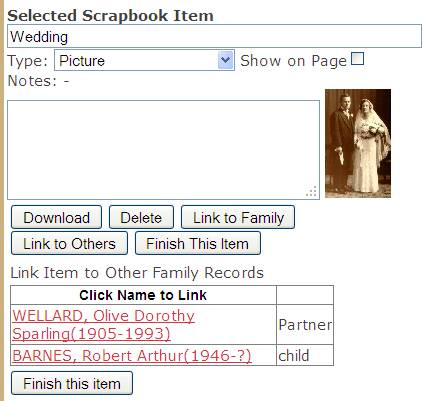
We click the first name, WELLARD. This links this picture to my mother, so that it is now in the scrapbook of both records. Then [Finish this item] returns us to the scrapbook page to upload another picture.
Adding Brothers and Sisters (Siblings)
As soon as
a parent is defined an [Add Sibling] button appears and you can add your
brothers and sisters. You can add details of them as you did of yourself. You
should wait until you have defined both your parents before you do this,
otherwise the new sibling records will be recorded as having only one parent in
common. For example, if you have recorded your mother and not your father, then
you record your siblings, then you record your father, they will be recorded as
being children of your mother but not of your father.
Step
parents, half brothers and sisters, etc. If you are dealing with a “blended
family” where one or other parent has remarried and so children may have only
one or other parent in common, then there are several ways of dealing with
this. Perhaps the easiest is to initially load the half-sibling as a full
sibling (both parents the same), then use the Family tab to break the incorrect
link as then create the appropriate records for the other parent. For example,
suppose that Child1 and Child2 both have the same mother (Mum), but different
fathers (Dad1, Dad2). You could proceed like this: -
1
Create
the record for Child1
2 Create the record for Mum
3 Create the record for Dad1
4 Create the record for Child2
Now we have an incorrect tree, as BOTH Child1 and Child2 will be shown as having parents Mum and Dad1.
5 Using the family tab, break the link from Child2 to Dad1
6 Display the Tree View for Child2. There will be no record in the Father position, just an [Add] button
7 Click this and add a record for Dad2
The tree is now correct, and will show Mum with two partners, Dad1 and Dad2. Mum will have children Child1 and Child2, but Dad1 will only have one child, Child1, and Dad2 will only have one child, Child2
Adding Grandparents.
Now it’s time to start filling in information about your grandparents. Depending on your circumstances your grandparents may live with you, live close by so that you can easily visit, or be in another city or country. If they are not close by then you may be able to communicate with them through your computer (Skype, Email, etc), by telephone, or you may need to write letters. If you know their email address add it to your family group and tell us so that we can add them to the School Group. That way you will share your family tree with them, and they will be able to help you with this project.
Tell them
that you want to find out about your family, so you’re writing to them for
information about them and their family – other children, ancestors, and so on.
Obviously you want the key information as above – dates and places of birth,
marriages, and deaths of dead ancestors, but personally I would want to get
some of the background story too: where they grew up, went to school, worked,
what was different then to our lives today, and anything else that they want to
tell us. As a grandparent I would love to be asked this sort of stuff by my
grandchildren and I’d be only too happy to tell them, but I don’t want to bore
them so I wait to be asked. Your grandparents probably feel the same.
There is an excellent guide to interviewing family. https://familysearch.org/sites/all/themes/frankie/documents/Step-1-Conducting-interviews.pdf
By the way, as you go collect photographs, copies of certificates and other documents, and of course the “stories” that they write for you, and stick them into the scrapbooks of the relevant records.
As well as
asking information about themselves, ask your grandparents about their parents,
and grandparents and as far back as they can go, and also about their other
children (your uncles and aunts) and your cousins. Some will know very little
about their ancestors, others will be keen family historians and will have a
wealth of knowledge to share. Some will have already prepared a family history,
either as a printed document or as a computer database. If they have prepared a
database of the family then this can be imported into FamNet, saving you a lot
of work. The next section show you how to link such a database into the records
that you’ve created so far.
Importing
a Family Database
Most keen
family historians will use a program such as Legacy, Family Tree Maker, etc to
record their family. These programs are a bit like FamNet, but work on your own
Windows or Apple personal computer. For example, let’s suppose that your
grandfather has used such a program. Instead of your having to get printouts
from his system and re-enter them into FamNet you can export the information
from the personal program and import it into FamNet. This saves a lot of work,
and eliminates many error opportunities.
First your
grandfather exports his database as a GEDCOM file. Click here to
read about GEDCOM files, and examples of creating them. He now has a file
somewhere on his computer with a name like “BarnesFamily.Ged”.
Now either
he imports it into FamNet, or he emails it to you and you import it. To import it, use the link “Upload your Family Data” from the
FamNet home page. After being uploaded it is processed, probably
overnight, so in the morning there will now be a database within FamNet’s GDB called (for example) “BarnesFamily.GED”
owned by either his userid or yours. If it is owned by your grandfather’s
userid then he should ensure that you are able to see all the records in it by
adding you to his family group with permission to view all of his records. Otherwise
you may not be able to see the records of living people in this database. This
will not be a problem if you have imported the GEDCOM yourself, but then you
should ensure that your grandfather can see your records by adding him to YOUR
family group. You might have already done this.
Now if you
search for the name of one of the records in this database you’ll find it. For
example, my grandfather’s name is “Alfred Wellard”,
and there is a record of him in the database “Barnes.Ged”
with record owner “robertb”. I can find this record
from the home page link “Look up people by name” like this: -
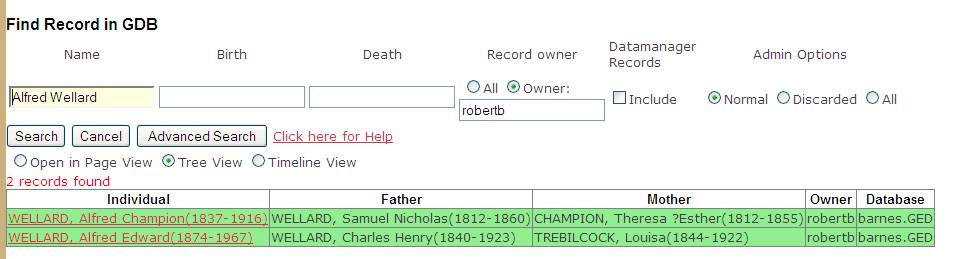
(In this
case I gave his name, and also specified a record owner, but more usually you
won’t bother to specify the record owner).
Linking these
records to your own.
The next
challenge is to add this record into your own tree. Here is the tree so far: -
WELLARD,
Alfred Edward(1874-1967) is my mother’s father. I
click this [Add] button as if I were going to create another on line record: -
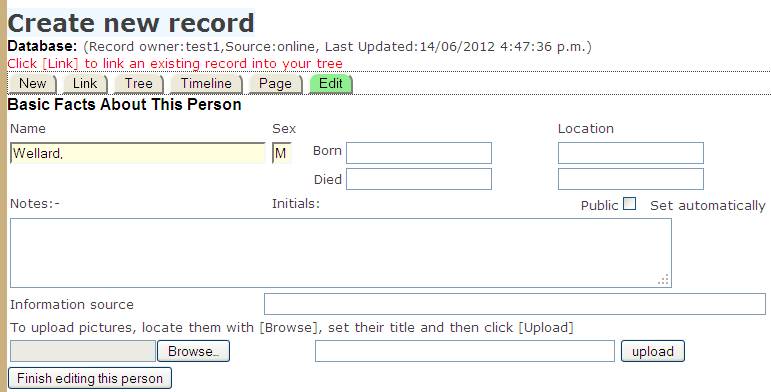
However I
won’t go ahead and create a record, as I did before. Note the message “Click [Link] to link an existing record into your tree”.
This tells me what to do: I click the [Link] button, and FamNet responds with
the search page. I set the search criteria, and click [Search]:-
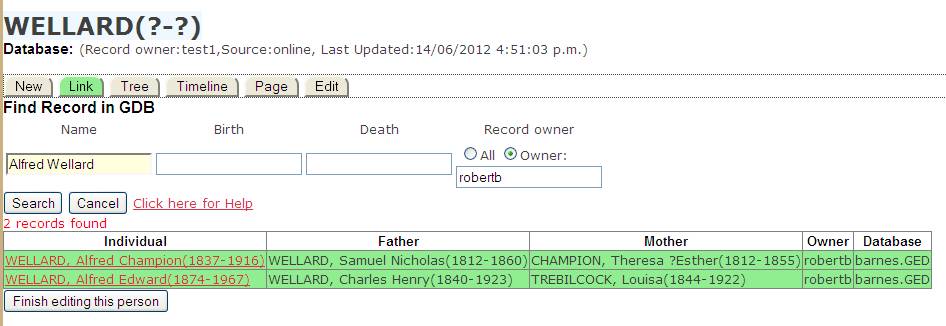
I click the
second record, and this is linked into the tree. We can do the same with my
Mother’s Mother, Olivia Barkman.
Because
I’ve linked to this existing record I will get all the ancestors of Alfred
Edward WELLARD that user robertb has recorded. If the
records are not just the bare GEDCOM information but have also been edited on
FamNet to add pictures etc you might see something like this: -
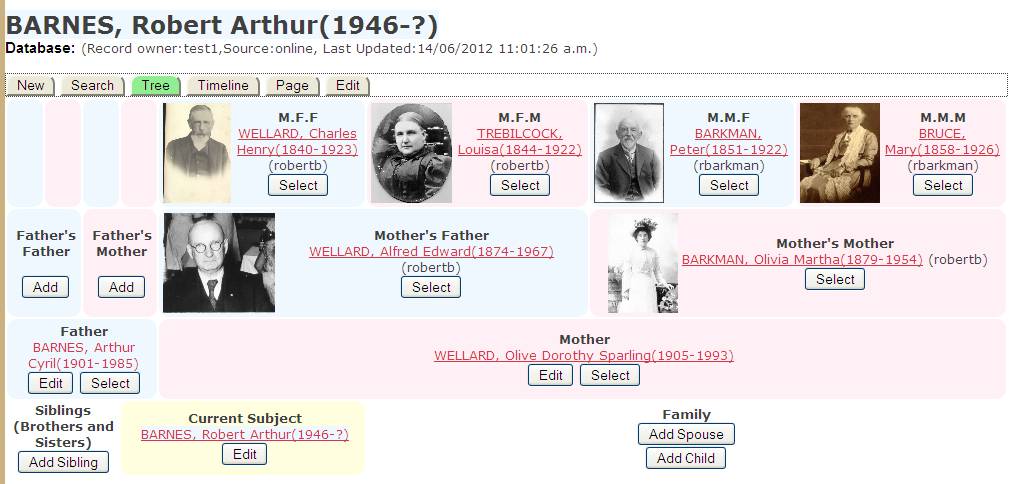
Notice that
the records are labelled as belonging to user “robertb”
(my normal logon, although for demonstration purposes here I am user “test1”.
GEDCOM
gives just bare information – names, dates, places, notes. It does not include
pictures, videos, attached documents, or all the features of more modern
database formats. However it is a very useful start, quickly creating a
framework on which you can hang the more interesting stuff like pictures and
stories.
In
Conclusion
In this way
we can push our database as far as possible by talking to our family. Remember
that anything you learn from somebody else, even your parents or grandparents,
is possibly wrong. A family story about an ancestor may be wrong. They may have
the dates, places, or even the basic facts wrong. So record whether the
information came from so that if you later find something contradictory you can
start to sort out the truth, or record “alternative truths” until something
turns up to resolve the difference of opinion. Even official documents like
certificates and census records can contain errors, and when you get back 100
years or so spellings may change, and details become sketchy. Don’t be afraid
to record unverified facts, but record your doubts too. You can write anything
you like in notes: don’t hesitate to write things like “Nana said that George
fought in WW1, but there’s no record of him in the Army(RB,
2012)”. Eventually this may be resolved and you can change the note.
Now, where
do we go for information when we’ve got what we can from our family?
To be
continued.