Uploading a GEDCOM
Introduction - what is a GEDCOM?
Creating a GED from Family Tree Maker
Creating a GED from Personal Ancestry File (PAF)
Step 3. Wait (do something else)
Uploading data from a genealogy program like Legacy is a simple three-step process: -
1. You export your database from your program as a GEDCOM
2. You upload this to FamNet
3. You wait for it to be processed (probably overnight)
Introduction - what is a GEDCOM?
“GEDCOM”, or GED for short, stands for “GEnealogy Data COMmunication”. GEDCOM is a standard data format that allows different genealogy programs to communicate with each other.
Many software producers have developed software that you can run on your PC or Mac to manage your family tree. Among the most popular are Family Tree Maker (FTM), Legacy, and Personal Ancestral File (PAF), but there are many others also. If I use (say) FTM, then I could send a copy of my FTM database to somebody else with whom I want to share data only if, like me, they use FTM. However my FTM database is no use to them if they use Legacy, PAF, or possibly even an earlier version of FTM to mine. What we need is a standard format that we can use to exchange information so that if I were to export my information in this standard format, it then wouldn’t matter if the other genealogist were to use the same program as me or another program. Gedcom is this standard. All of the serious genealogy programs can export data as a GED, and read GED data into their own database format.
The following is a brief example of a GED file. As you can see, it is a bit complicated, and not the sort of thing that you want to work with yourself. And this example has even been simplified!
0 HEAD
0 @I0001@ INDI
1 NAME Rachel Mary /Barnes/
2 GIVN Rachel Mary
2 SURN Barnes
1 SEX F
1 BIRT
2 DATE 26 MAR 1870
2 PLAC National Women's Hospital, Auckland.
1 OBJE
2 FORM jpg
2 FILE C:\Documents and Settings\Robertb.ROBERTB\My Documents\My Pictures\My Pictures\Rachel\4Feb06 012.jpg
1 FAMC @F41@
0 @I0002@ INDI
1 NAME Hannah Ruth /Barnes/
1 SEX F
1 BIRT
2 DATE 21 DEC 1871
2 PLAC St Helen's Hospital, Wellington
1 OBJE
2 FORM jpg
2 FILE C:\Documents and Settings\Robertb.ROBERTB\My Documents\My Pictures\My Pictures\Hannah\P1000616.jpg
1 FAMC @F41@
1 NOTE @NI0002@
0 @NI0002@ NOTE
1 CONC Mum's Aunty Darley (Alice Darley Wellard)
1 CONT lived with them. I remember Aunty Darly as a very sprightly 80 year
1 CONT old. Rex and Elspeth had two cats, one of which was the largest
1 CONT cat I've ever seen - 20 pounds, as fat as!! If it jumped on to your
1 CONT bed at night, you didn't get up.
0 @I0144@ INDI
1 NAME Emily Ann /Barnes/
1 SEX F
1 BIRT
2 DATE BEF 31 OCT 1974
2 PLAC St Helen's Hospital, Auckland
1 FAMC @F41@
0 @I0366@ INDI
1 NAME Robert Arthur /Barnes/
1 SEX M
1 BIRT
2 DATE 28 MAY
2 PLAC Wanganui, New Zealand
1 FAMS @F41@
0 @F41@ FAM
1 HUSB @I0366@
1 CHIL @I0001@
2 _FREL Natural
2 _MREL Natural
1 CHIL @I0002@
2 _FREL Natural
2 _MREL Natural
1 CHIL @I0144@
2 _FREL Natural
2 _MREL Natural
0 TRLR
Step 1. Create a GEDCOM
Export your data to a GEDCOM, saving it in a folder on your computer. Most programs allow you to select particular individuals or ancestral lines: you may choose to do this, but you don’t need to. In particular, you don’t need to filter out the living people: FamNet will hide these from the general public anyway, so why bother? The following notes assume that you are going to load your complete records. If you are using a genealogy program other than Family Tree Maker or PAF (Personal Ancestral File), then the details will be different, but the concepts will be similar to the examples below. Larger GEDCOM files should be compressed (“Zipped”) – see notes below.
Creating a GED from Family Tree Maker
· Open your FTM database with Family Tree Maker.
· File Menu. Select Export File -> Entire File {or in some versions "Copy/Export Family File...". You may not get a choice of anything except the entire file}.
· A windows Explorer window is displayed allowing you to select where you want the exported file to be stored. This window may start with “please supply a name for the copy...". At the bottom of this there is a combo “Save as Type. Select the last option, GEDCOM (no other option will produce a file that FamNet can process).
· Set a name and location for the saved file, and click [Save]. A window “Export to Gedcom” is produced.
· Click [OK]. You don’t need to change anything.
· A progress indicator window appears while the GED is produced, and the GED is stored. You can then load it to FamNet.
Creating a GED from Personal Ancestry File (PAF)
· Open your PAF database with PAF
· File Menu. Select Export. An Export window is produced.
·
In the Export window, select options: -
Export to: Other GEDCOM 5.5
Include:Checkeverything
Select Individuals:All
· Click [OK]. Fill in the details required by the next dialog (Name, at least two lines of address), and click [OK]
· The next window is the standard Windows Save dialog. Select the folder for the file, and type in the name, e.g. Barnes.GED. The file extension MUST be .GED.
· Click [Export]. The GED is stored, and you can then load it to FamNet.
The details will be slightly different with other programs, but the general principles will be the same.
Most programs allow you to select particular individuals or ancestral lines: you may choose to do this, but you don’t need to. In particular, you don’t need to filter out the living people. FamNet will hide these from the general public anyway, so why bother?
You now have a GEDCOM saved somewhere on your computer that you can upload to FamNet
Naming your GEDCOM
You can name the GEDCOM file anything you like. However, YOU SHOULD AVOID SNAPSHOT NAMES, like “Cairns Doole 2007.GED” or BARNES070425. While it seems useful, telling you how current this data is, there will be unintended consequences later, if you submit a later GEDCOM to update your database.
When you submit another GEDCOM, then FamNet treats it as an
update if it has the same name, but as a new database if it has a different
name such as “Cairns Doole 2008.GED”.
If you feel that you’ve made a mistake with your database name, contact us to change it for you.
Compressing Large GEDCOM files
GEDCOM files can be uploaded in their original .GED format, or compressed into a ZIP file. For larger databases ZIP files save significant uploading time, and are a way of circumventing the 8MB limit imposed by FamNet. To compress a GED (example dialog with Windows XP): -
1. Open the folder containing your GED file.
2. Right-click the GED file.
3. Click “Send to” and select “Compressed (Zipped) Folder”
This results in a .zip file being created in the same folder as the original .ged file: -
![]()
If you open the .zip archive you’ll see that it contains a copy of the original .GED file and no other files. In this case it is about 1/6th of the size of the original file, so you will see that uploading is significantly faster.
Step 2. Upload the GEDCOM
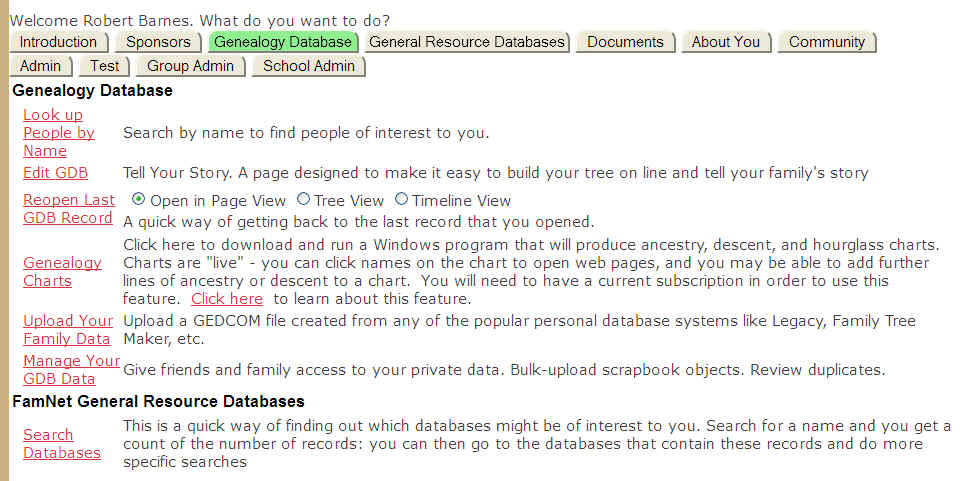
1. From the Home page, click the tab "Genealogy Database". Click the option "Upload Your Family Data":-
2. Locate the .ZIP or .GED file you created in Step 1, and then click the [Continue] button: -
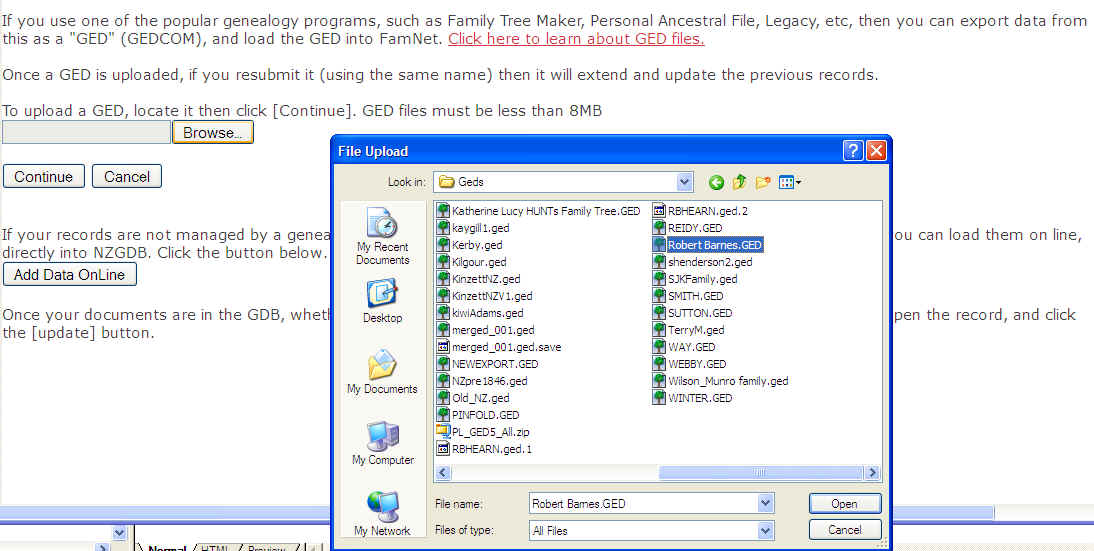
If you created a .ZIP file as in the example with .byrne.zip, upload the .zip file NOT the GED file.
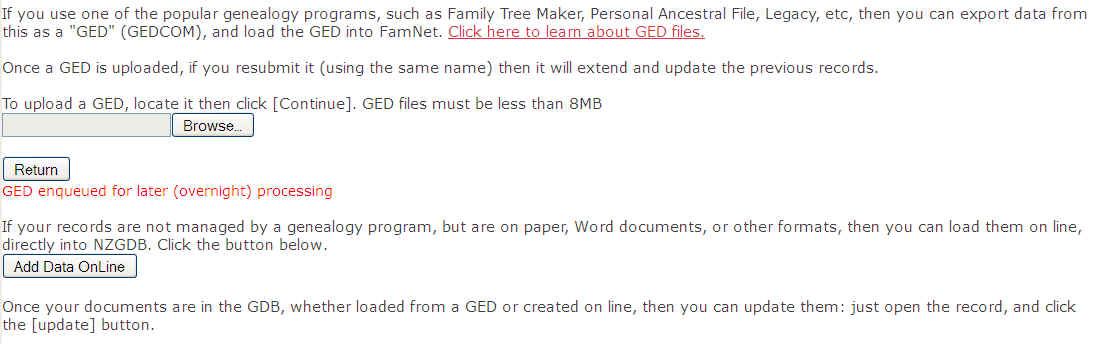
3. When it has been uploaded, there will be a message: -
Step 3. Wait (do something else)
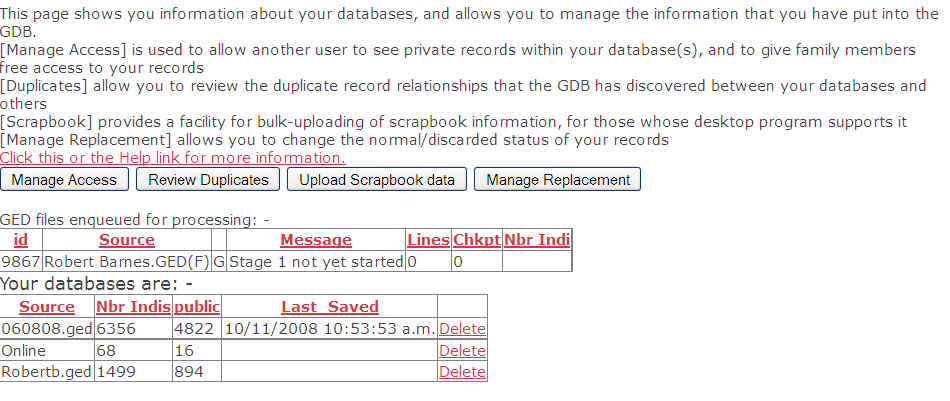
You now have to wait until the GEDCOM is processed. This is probably overnight. You can see the current status of your GEDCOM from the menu "Manage your GDB Data", where the enqueued file will show in a list: -
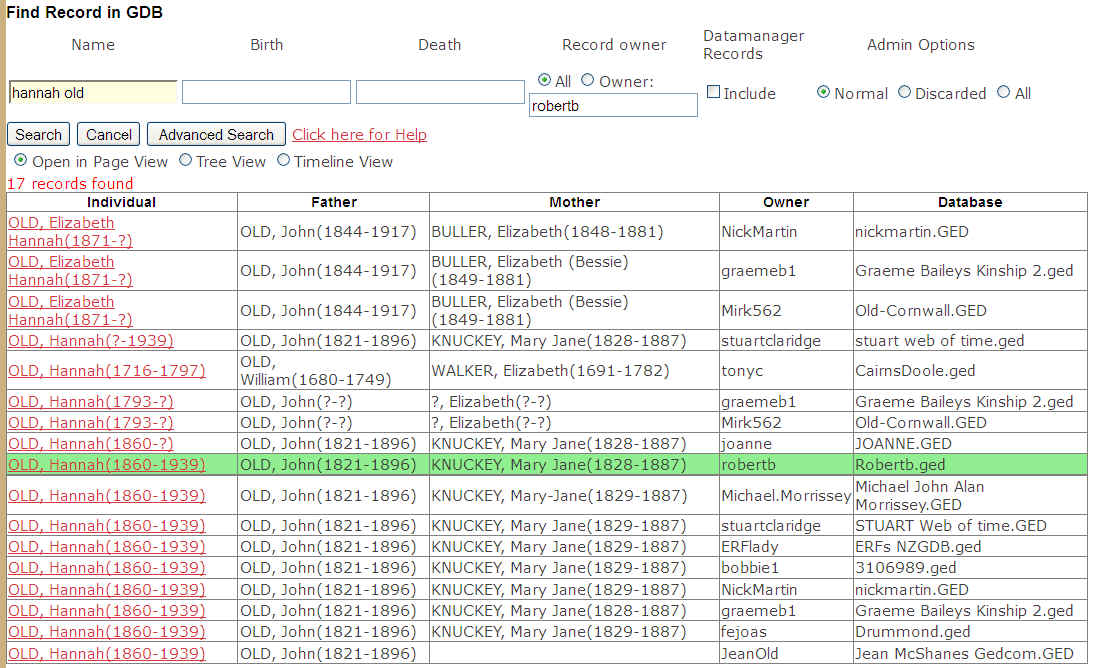
Step 4. Access your data.
When the GEDCOM has been processed you can find your records by looking up your names, and clicking on the record that you want to open. Note that in FamNet you look up a name, not a database. In this example I've searched for my grandmother, Hannah OLD. My record is the one highlighted in green. The highlighting is because it has scrapbook items - photos and document, not because it is my record: -